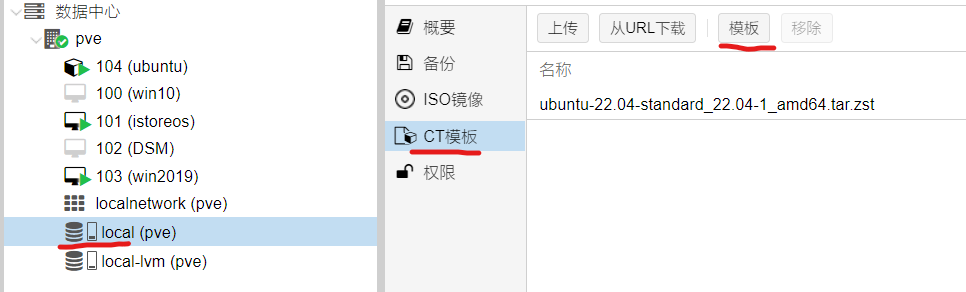
第一步先下载模板

我这里选的LTS 22.04
然后创建CT
这里如果不勾选无特权的容器后面的docker会报错
docker: Error response from daemon: AppArmor enabled on system but the docker-default profile could not be loaded: running `/usr/sbin/apparmor_parser apparmor_parser -Kr /var/lib/docker/tmp/docker-default3871768813` failed with output: apparmor_parser: Unable to replace "docker-default". Permission denied; attempted to load a profile while confined?
下面这一段我没做,不知干啥的
关于远程ssh,修改这两个文件
vim /etc/ssh/sshd_config
vim /etc/ssh/ssh_config
嗯,没有vim 使用vi 但按I键后再按后退没反应...于是用nano吧
但发现不打开这个PasswordAuthentication 也能远程ssh,只需要这一句打开PermitRootLogin就可以远程登录了
sed -i '/PermitRootLogin/ a PermitRootLogin yes' /etc/ssh/sshd_config
然后安装docker
先 apt update
2024.7.12
发现自带源执行apt update比较慢,需要先换源
首先切换目录
cd /etc/apt
再备份下
cp sources.list sources.list.bak
再替换
sed -i 's@//.*archive.ubuntu.com@//mirrors.ustc.edu.cn@g' sources.list
然后就可以apt update了
再apt install docker.io
如果运行apt install docker-ce的话会报找不到,关于docker的版本Docker入门笔记02:docker的版本,你真的搞清楚了吗 - 知乎 (zhihu.com)
安装后再安装portainer-ce
docker pull portainer/portainer-ce:latest
再创建数据卷
docker volume create portainer_data
然后创建容器
docker run -d -p 8000:8000 -p 9000:9000 --name=portainer --restart=always -v /var/run/docker.sock:/var/run/docker.sock -v portainer_data:/data portainer/portainer-ce:latest
然后访问 http://[ip]:9000
创建用户后提示
Your Portainer instance timed out for security purposes. To re-enable your Portainer instance, you will need to restart Portainer.
重启下容器
先查看容器ID
docker ps
然后docker restart xxxxxx
然后再刷新页面再重新设置密码
查看LXC容器IP
输入 ifconfig发现需要安装net-tools 那么apt install net-tools ,PVE也可以如此
关于LXC容器获取IPV6 起初我设置为DHCP 没有获取到,发现PVE也没获取到,还以为是PVE的问题,又试了下另一个vmbr1还是不行,但试了下windows 又可以获取到。后来尝试了下设为SLAAC 可以获取到2409开头的
2024.03.04
上图中的ipv4一定要选择dhcp 不然会导致下面ipv6也无法获取
前几天折腾发现上面的lxc容器无法挂载nfs和cifs ,原因是创建ct的时候未取消勾选【无特权的容器】 导致nfs和cifs无法勾选
原因是PVE默认限制了LXC容器的NFS权限
尝试即便在宿主机中执行service apparmor stop 重启了lxc容器还是不行?
执行下面的简单粗暴命令重启lxc也不行?
# echo "lxc.apparmor.profile: unconfined" >> /etc/pve/lxc/100.conf
看来无特权的容器就是不行?
单独设置nfs方法
宿主机中复制一份文件
# cp /etc/apparmor.d/lxc/lxc-default-cgns /etc/apparmor.d/lxc/lxc-default-nfs
我的改成如下了
# Do not load this file.  Rather, load /etc/apparmor.d/lxc-containers, which
# will source all profiles under /etc/apparmor.d/lxc

profile lxc-default-nfs flags=(attach_disconnected,mediate_deleted) {
  #include <abstractions/lxc/container-base>

  # the container may never be allowed to mount devpts.  If it does, it
  # will remount the host's devpts.  We could allow it to do it with
  # the newinstance option (but, right now, we don't).
  deny mount fstype=devpts,
  mount fstype=cgroup -> /sys/fs/cgroup/**,
  mount fstype=cgroup2 -> /sys/fs/cgroup/**,
  mount fstype=overlay,
  mount fstype=nfs*,
  mount fstype=rpc_pipefs,
  mount fstype=cifs,
}
注意第三行profile 后的名称,最后三行是新加的。
然后加载新的规则
apparmor_parser -r /etc/apparmor.d/lxc-containers
重启apparmor
systemctl reload apparmor
追加到lxc 配置文件中
echo "lxc.apparmor.profile : lxc-default-nfs" >> /etc/pve/lxc/xxx.conf
注意profile后文件名
然后重启LXC容器就可以挂载NFS了,然而我试了这会导致LXC无法启动?还是无特权容器造成?
mount 还是报以下错误
mount error(1): Operation not permitted
Refer to the mount.cifs(8) manual page (e.g. man mount.cifs) and kernel log messages (dmesg)
docker硬解配置
查询资料需要在LXC的配置文件中加入,配置文件路径就是上面的 /etc/pve/lxc/xxx.conf
lxc.cgroup2.devices.allow: c 226:0 rwm
lxc.cgroup2.devices.allow: c 226:128 rwm
lxc.cgroup2.devices.allow: c 29:0 rwm
lxc.mount.entry: /dev/dri dev/dri none bind,optional,create=dir
lxc.mount.entry: /dev/fb0 dev/fb0 none bind,optional,create=file
lxc.apparmor.profile: unconfined
ls -la /dev/dri 可查看是否成功
最后一句就是上面的暴力解决apparmor 虽然我没有解决。而且还是发现加上lxc.apparmor.profile: unconfined 会导致docker无法启动
报
Error response from daemon: Could not check if docker-default AppArmor profile was loaded: open /sys/kernel/security/apparmor/profiles: permission denied
Error: failed to start containers: 98fb11a16cca
那么只好重建LXC容器不勾选无特权的容器。发现docker 还是报错
Error response from daemon: AppArmor enabled on system but the docker-default profile could not be loaded: running `/usr/sbin/apparmor_parser apparmor_parser -Kr /var/lib/docker/tmp/docker-default3530020066` failed with output: apparmor_parser: Unable to replace "docker-default". Permission denied; attempted to load a profile while confined?
有说直接通过指令把apparmor卸载掉,简单粗暴。
sudo apt-get remove apparmor
我没有采用此种方法。尝试在宿主机中停止apparmor 然后重启了LXC 发现仍然报上面错...
然后在Docker in LXC with kvm plugin AppArmor issue - General - openmediavault这个网站找到
LXC容器中执行以下指令
umount /sys/kernel/security && systemctl restart docker
然后docker 运行容器果然成功...
然后发现在Portainer 无法创建容器,报以下错误
invalid CapDrop: capability not supported by your kernel or not available in the current environment: "CAP_MAC_ADMIN"
那么尝试运行命令,一下成功
docker run -d -p 8096:8096 --name=jellyfin --restart=always -v /var/run/docker.sock:/var/run/docker.sock -v /mnt/qnas:/data jellyfin/jellyfin:latest
然后发现还是无法硬解,删除容器再重新以下命令创建
docker run -d -p 8096:8096   --name=jellyfin --restart=always -v /var/run/docker.sock:/var/run/docker.sock -v /mnt/qnas:/data \
-e TZ=Asia/Shanghai -e PUID=0 -e PGID=0 \
--device=/dev/dri:/dev/dri \
jellyfin/jellyfin:latest
可以实现硬解
2024.03.05
上面portainer创建容器报错的问题,在github上找到了解决方法,好像是因为本地上传的image?
2.17.1 Create container error · Issue #8684 · portainer/portainer (github.com)
So after a quick research I found a "quick and very dirty" solution.
Obviously Docker needs the capability mac_admin and some others too.
Our specific problem at this point is proxmox especially the lxc configuration not Docker by itself.
You can add the following line to your /etc/pve/nodes/pve/lxc/xxx.conflxc.cap.drop:
This will clear the cap drops.
Seems not the best solution for me but it works and Docker now gets what it needs.
修改后需要重启lxc
处理jellyfin,直接在docker中执行mount报权限不足那么先在宿主机中挂载NAS目录
nfs不像smb那样需要用户名密码?我的nas是威联通,需要如下设置
先开始NFS
打开控制台->win/mac/nfs/webDAV
我这里只勾选了NFS V4
然后打开控制台->共享文件夹
然后创建一个共享文件夹,这个文件夹是虚拟的可以选择实际的文件目录
点击上面的创建,选择共享文件夹菜单,注意下面两个红色框
创建完成后,点击列表中的编辑共享文件夹权限图标
至此 NAS设置就完成了。
然后在LXC中执行 mount -t nfs4 192.168.8.121:/movie /mnt/movie
2024.7.13
发现执行上面命令报错bad option; for several filesystems (e.g. nfs, cifs) you might need a /sbin/mount.<type> helper program
需要先执行
apt install nfs-common
取消挂载 umount /mnt/movie
开机自动挂载
修改/etc/fstab 加入以下代码
192.168.8.121:/movie /mnt/movie nfs4 defaults 0 0
修改docker容器的映射目录,由于不想删除容器重新运行docker run ,可以采用以下方法修改
先停止docker 非常重要,不然修改不会生效又会还原成以前的
systemctl stop docker.service
然后修改/var/lib/docker/containers/容器ID 中的config.v2.json
可以先json格式化一下,修改这4个地方
修改后重启docker
systemctl start docker.service